How To Grout Glass Tiles:
An Expert Step-by-Step
Guide For A Perfect Finish
Grouting is the final step in any tiling project, and where the project really comes to life. But when it comes to glass tiles, and especially glass mosaics, it’s also where attention to detail truly matters.
With their reflective surfaces, intricate layouts, and pristine finishes that need to be maintained, glass mosaics require a slightly different type of precision than ceramic or stone tiles.
In this guide we’ll walk you through exactly how to grout glass tiles to help you avoid common mistakes, achieve a smooth, consistent finish, and bring out the best in your tiling.
What Makes Grouting Glass Mosaics Different?

While the core steps are the same as with other tile types, glass mosaics come with some unique considerations when it comes to grouting:
1. More grout joints mean more chances for uneven fill or grout haze.
2. Small tile faces make surface cleaning trickier, and haze settles quickly and visibly.
3. Sheet edges on mesh-mounted mosaics can become visible if grout isn’t worked between them properly.
4. Uneven heights (especially in hand-cut or mixed-material mosaics) can lead to inconsistent grout lines if not handled carefully.
In short, grouting glass mosaics is not necessarily more difficult than grouting other types of tile, but it does require a little more precision and patience.
Tools and Materials You’ll Need

Unsanded grout (ideal for joint widths under 3 mm; prevents scratching)
White thin-set adhesive if working in stages or regrouting
Soft rubber grout float
Two buckets, one for clean rinsing and one for grout water
Sponge: non-abrasive, slightly firm
Microfibre cloth for buffing
Grout sealer if required
Optional but useful: painter’s tape, grout haze remover, detail brush
Step 1: Let Adhesive Fully Cure

Before you start grouting, make absolutely sure your tile adhesive has fully cured. This usually takes at least 24 hours, but timing depends on the type of adhesive, the surface, and environmental conditions like room temperature and humidity.
This step is particularly critical for glass mosaic tiles, which are lightweight and often mounted on mesh sheets. If the adhesive isn’t fully set, the pressure of grouting can shift tiles out of alignment which can be especially noticeable on small, consistent shapes like square mosaics or rectangular mosaics.
Why it Matters: Grouting too early can pull tiles out of position, especially at sheet edges or corners. It can also compromise the bond between the tile and substrate, and lead to uneven joints or cracking over time.
Always follow the adhesive manufacturer's cure time to the letter. If it says 24 hours, give it 24.
In cool or damp conditions, give it even longer.
Lightly press on a few tesserae (the individual tiles in the mosaic) with your fingertip before grouting. If any move or feel soft under pressure, the adhesive isn't ready yet.
Never grout on the same day you install glass tiles unless you’re using a rapid-set adhesive that explicitly allows this.
Step 2: Mix the Grout

If you're using powdered grout, mix it with clean water exactly as instructed on the packaging. You're aiming for a smooth, creamy, paste-like consistency (like peanut butter or toothpaste). It should be thick enough to hold its shape, but soft enough to push easily into tight joints.
Most glass mosaics have joints under 3 mm wide, which makes unsanded grout the right choice. It’s smoother, won’t scratch the glass surface, and flows better into narrow gaps.
Why it Matters: A grout that’s too dry won’t fully fill the joints. A mix that’s too wet can slump, shrink, or dry unevenly, all of which lead to weak or patchy grout lines.
After mixing, let the grout “slake” (rest undisturbed for 5–10 minutes) to allow the ingredients to fully activate.
Re-mix after slaking, but do not add more water.
If using pre-mixed grout, stir thoroughly to remove air pockets and improve consistency.
Mix small batches if you're new to mosaics. You don’t want the grout drying out before you’ve finished applying it, but be sure to use the same ratio of grout to water for colour matching.
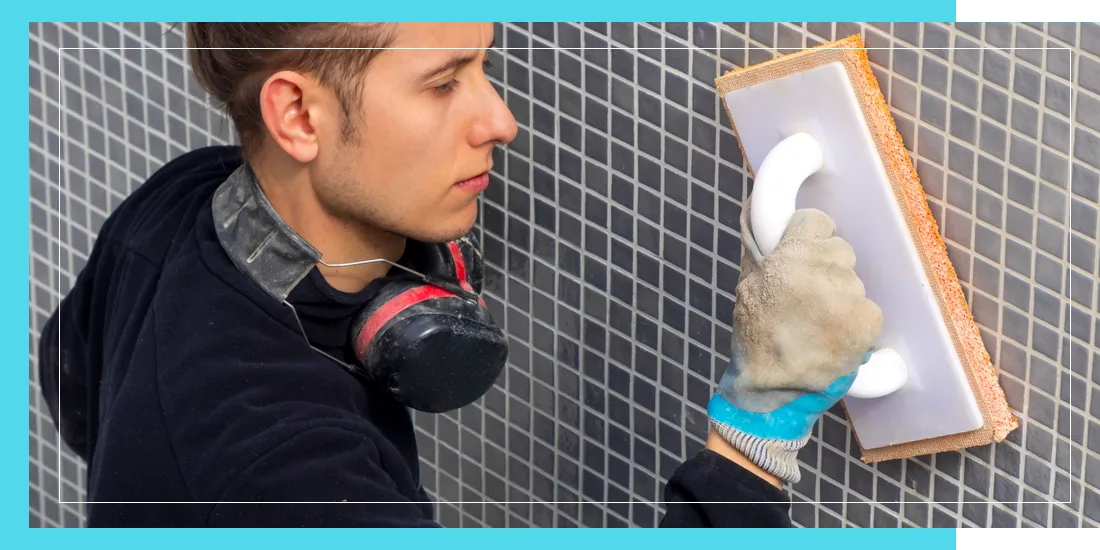
Step 3: Apply Grout With a Rubber Float

Use a soft rubber grout float, held at a 45° angle. Apply the grout across the surface in diagonal strokes, pressing firmly enough to work the grout into every joint between individual tiles, not just across the top of the mesh sheets.
How the direction of light will change across morning and evening.
Whether direct sunlight will hit the tiles (this can enhance shimmer but may create glare).
How the colours in your tiles appear in natural light. Some glass can look cooler or warmer depending on exposure.
Why it matters: Glass mosaic sheets often have very small, closely spaced tiles. If you only skim the surface, some joints may be left underfilled, leading to patchiness or visible sheet lines.
Push grout into joints from multiple angles to avoid air pockets.
For mesh-mounted mosaics, make sure grout is pressed right into the spaces between each individual tessera, not just across the top.
Step 4: Remove Excess Grout Carefully
After the grout begins to firm up, which typically takes around 10 to 15 minutes, start cleaning the surface using a damp (but not dripping wet) sponge.
Wipe in a light, diagonal motion across the face of the tiles.
Rinse the sponge often, wring it thoroughly, and never let dirty water back onto the surface.
Avoid wiping in straight lines along the joints because this can pull the grout out.
Why it matters: Mosaic tiles have lots of joints, and the small tile faces can make cleanup more difficult. Over-wiping can remove grout from shallow joints, while under-wiping leaves haze and excess.
After mixing, let the grout “slake” (rest undisturbed for 5–10 minutes) to allow the ingredients to fully activate.
Re-mix after slaking, but do not add more water.
If using pre-mixed grout, stir thoroughly to remove air pockets and improve consistency.
Mix small batches if you're new to mosaics. You don’t want the grout drying out before you’ve finished applying it, but be sure to use the same ratio of grout to water for colour matching.
Step 5: Buff Away Grout Haze

After about 30 to 60 minutes, the surface will develop a thin, cloudy residue known as grout haze. This is normal and needs to be buffed away to restore the clarity of the glass.
Use a dry, soft microfiber cloth to buff the surface in circular motions.
Repeat gently if needed. Never scrub with anything abrasive.
Don’t rush this step; it’s key to the polished, clean look mosaics are known for.
Why it matters: Haze is especially visible on glass mosaics, particularly if the tiles have a glossy, iridescent, or dark finish. If left too long, it can harden and become very difficult to remove without damaging the tile.
Check your work under different angles of light to catch any missed spots.
Don’t leave haze overnight. It’s far easier to remove within the first hour or two.
For stubborn haze, lightly dampen your cloth or use a grout haze remover suitable for glass, but always test in an inconspicuous area first.
Step 6: Let Grout Cure Fully

Once cleaned, allow the grout to cure for the full duration specified by the manufacturer (usually 24 to 72 hours). During this time, keep the area dry and undisturbed.
Why it matters: Moisture exposure before full cure can weaken the grout, cause uneven colouring, or create long-term issues like mould growth; especially in bathrooms, wet rooms, or kitchen splash zones.
Don’t wipe, wash, or expose the tiles to steam during this period
Ventilate the room well to promote even drying. Use a fan or dehumidifier if needed.
If it’s a floor area, avoid walking on it until the grout is fully cured.
Step 7: Seal the Grout (If Required)
Not all grout types need sealing, but some cement-based grouts do, especially when used in wet environments or high-use areas.
Check the grout label to see if it’s a “non-porous” or “pre-sealed” formula.
If sealing is needed, apply it once the grout is fully cured using a narrow applicator or sponge-tipped bottle.
Be careful not to get sealer on the glass tile surface as it can leave residue.
Why it matters: Sealing protects the grout from water absorption, stains, and mildew, helping it last longer and stay cleaner.
Apply sealer to a small, inconspicuous section first to check for visual effects. If you do get sealer on the tile face, wipe it off immediately with a clean cloth.
Final Tips for Grouting Glass Mosaics

1. Use painter’s tape to protect walls, trim, or fixtures nearby.
2. Practice on a sample board if you're new to mosaics - it's a different rhythm to grouting large tiles.
3. If you're working with mixed-texture or mixed-material mosaics, take extra care cleaning uneven surfaces.
4. Always grout a small test area first, especially if using a coloured grout.
5. Stay organised: clean tools, good lighting, and small batches of grout make the job smoother.
6. Don’t rush the job. Mosaics reward patience and precision.
Grouting glass mosaic tiles isn’t difficult, but it does require care, control, and a bit of patience. With the right approach, you can create a clean, consistent, and long-lasting finish that brings out the depth and brilliance of your mosaic design.
So take it one step at a time, follow the process, and don’t rush it. The results will speak for themselves.
Need Help or Inspiration?
If you have questions about grouting, selecting the right materials, or anything else mosaic tile related, feel free to get in touch. We’re always happy to help.
You can also browse our full range of glass mosaic tiles for styles and finishes to suit every space, or explore more guides for inspiration, help, and advice.